Delta Force has various game modes. One of the biggest modes is Hazard Operations. It is a major game mode comprising of a three-member squads and the goal is to find loot, accomplish missions, and finally escape safely. It is also known as the Extraction Mode since the major goal is to “extract” safely. This mode throws you against real players and bots. For those who are new to the game, you may read our guide and learn how to be a pro in the Hazard Operations mode.
Efficient Gearing Up: Mastering Gear Sets
When you’re just starting out in Delta Force, your gear inventory might feel a bit sparse. No worries, though! Here’s how to gear up efficiently and make the most out of every resource:
Gear Sets and Gear Tickets
Accessing Gear Sets
Gear Sets are predefined combinations of weapons, armor, and equipment that you can use to quickly outfit your character. To access Gear Sets:
Dear Delta Force Hawk Ops Fans,
Have you joined our community website? Join now to get access to groups, forums, and much more with your fellow Delta Force fans.
Join Delta Force Hawk Ops CommunityCheers and happy gaming!
- Navigate to the Gear Sets Section: This is typically found in the main menu under the gear or loadout options.
- Utilize Gear Tickets: If your stash is limited, gear tickets become invaluable. These tickets allow you to unlock different Gear Sets without having to purchase each item individually.
Types of Gear Tickets
Understanding the different types of Gear Tickets is crucial for efficient gearing:
- White Gear Tickets:
- Acquisition: Earned passively, one every 8 hours through regular gameplay and u-mail (in-game mail system).
- Purpose: These tickets provide access to standard gear sets, making them perfect for early-game progression.
- Elite Gear Tickets:
- Acquisition: Typically obtained as event rewards or through special in-game activities.
- Purpose: These tickets unlock superior gear sets with better weapons and armor, giving you a significant advantage in battles.
Selecting the Right Loadout
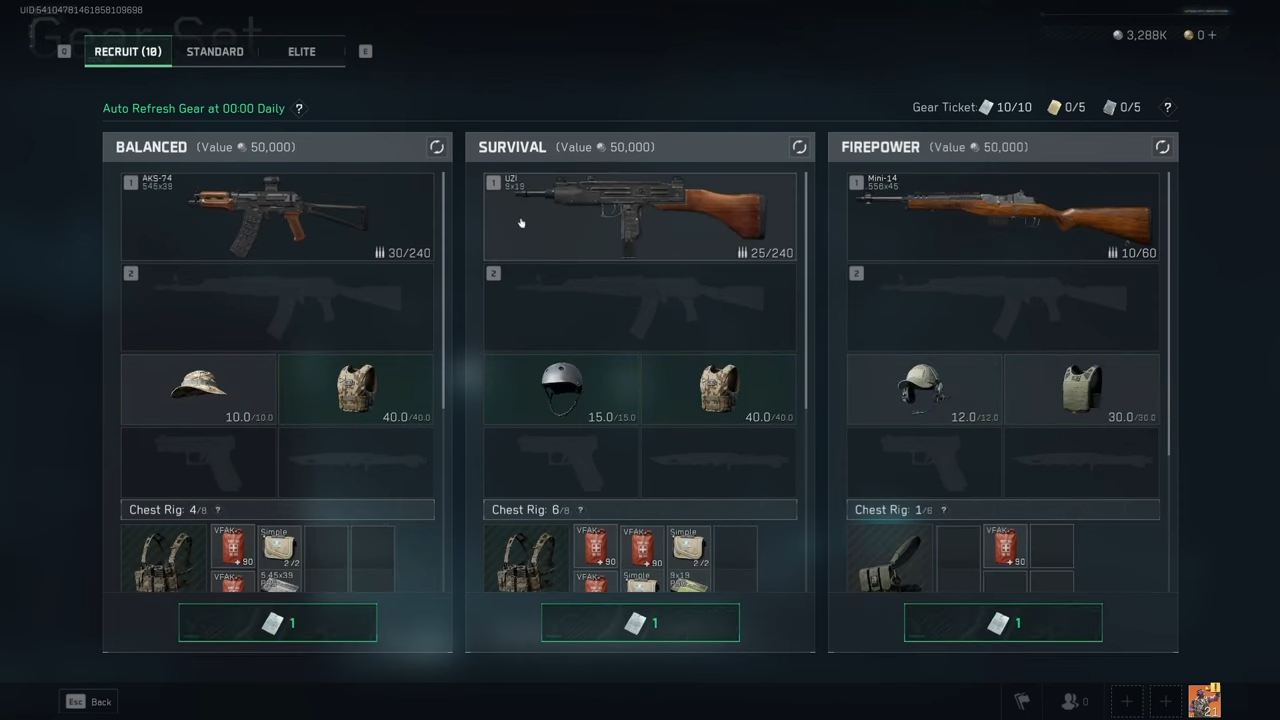
Choosing the appropriate loadout based on your playstyle can drastically improve your performance. Here are the primary loadout types:
- Firepower:
- Focus: High-damage weapons with less armor.
- Ideal For: Aggressive players who prefer taking the fight directly to the enemy.
- Pros: Superior firepower and damage output.
- Cons: Reduced armor means lower survivability.
- Survival:
- Focus: Better armor with reduced weapon quality and ammo.
- Ideal For: Defensive players who prioritize staying alive over dealing damage.
- Pros: Enhanced protection with higher-tier armor.
- Cons: Weaker weapons and limited ammunition can hinder offensive capabilities.
- Balance:
- Focus: A mix of firepower and survival elements.
- Ideal For: Versatile gamers who want a balanced approach to both offense and defense.
- Pros: Well-rounded loadout catering to various combat scenarios.
- Cons: May not excel in either offense or defense compared to specialized loadouts.
Pro Tip: Start with the Survival Kit. Pair it with a reliable weapon like the Uzi and upgrade your ammo through the auction house for better performance. This setup provides decent armor and enhanced ammo, giving you a solid foundation as you learn the maps.
Optimizing Your Loadouts
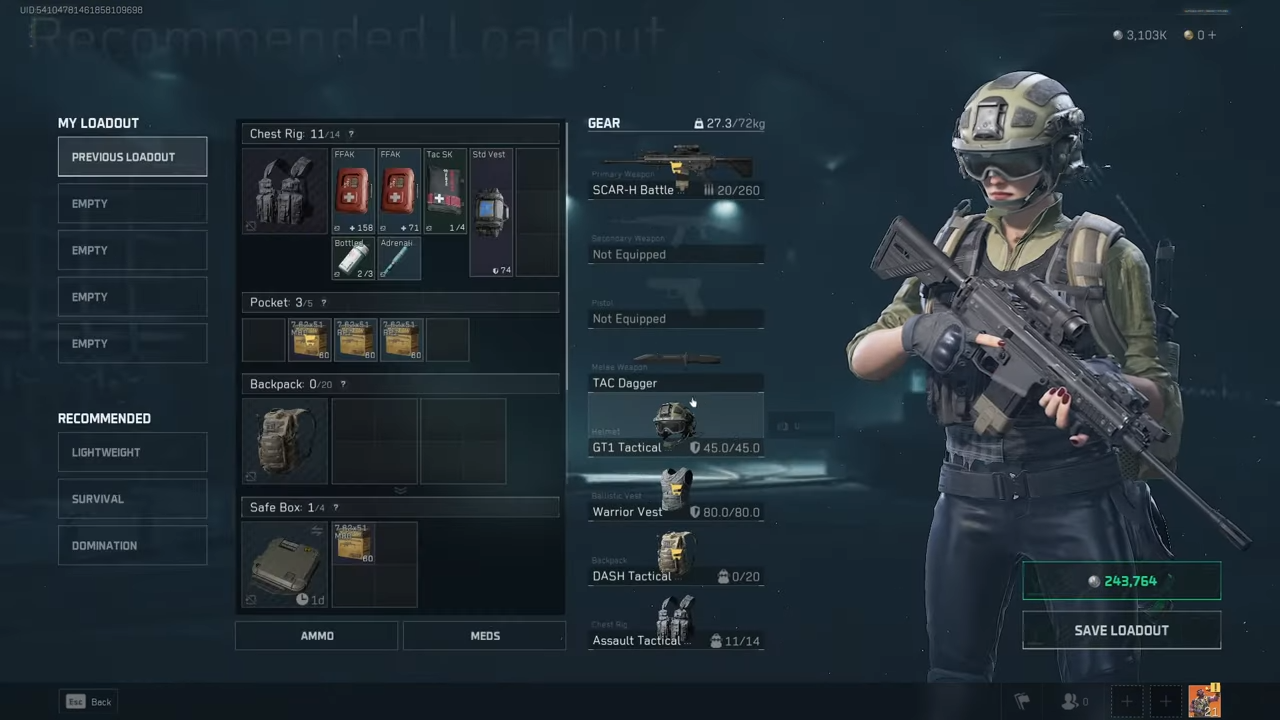
Once you’ve selected a gear set, saving your preferred loadouts ensures quick access in future raids. Here’s how to optimize your loadouts:
- Equip Your Gear:
- Head to the gear section and equip your chosen items, including weapons, armor, and accessories.
- Save Your Loadout:
- Click on Save Loadout and name it appropriately (e.g., “Survival Uzi Setup”). This allows you to quickly switch between different gear configurations based on your needs.
- Apply with Ease:
- Next time you enter a raid, simply apply your saved loadout to jump right into action without wasting time re-equipping each item manually.
Recommended Loadouts:
- Survival Kit: Best for beginners due to superior armor, providing enhanced protection during initial gameplay.
- Elite Gear Sets: If you have elite tickets, opt for these to start with higher-tier gear, giving you an edge over less-equipped players.
Smart Loot Management
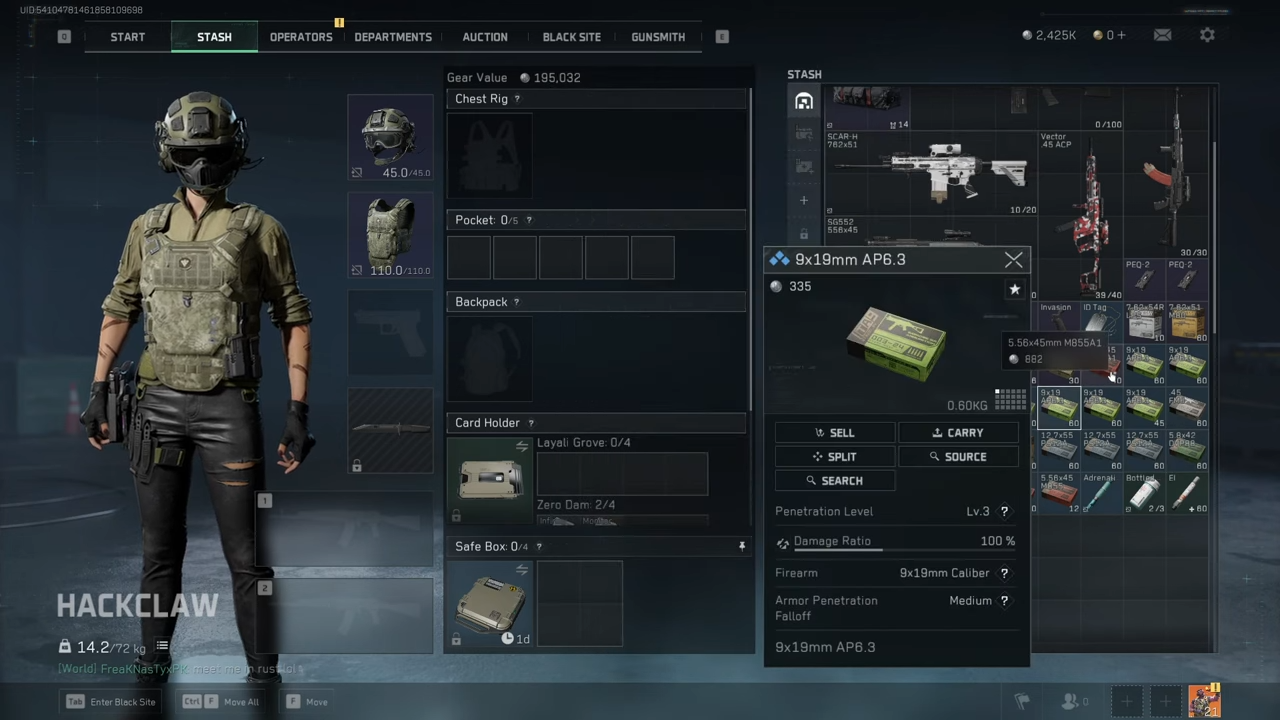
Managing your loot efficiently after each raid is essential to stay prepared for future missions. Here’s how to handle your loot like a pro:
Move Loot to Stash
- Action: Use the Move All Loot button to transfer items swiftly from the raid into your personal stash.
- Benefit: Keeps your inventory organized and ensures you don’t lose valuable items after each mission.
Organize Ammo and Meds
- Ammo Storage: Store better ammo types (e.g., blue or purple) in your safe box for easy access during raids.
- Meds Organization: Keep essential medical supplies ready in your stash to maintain health and stamina during battles.
Quick Confirmation
- Action: Hit Confirm to finalize your preparations.
- Benefit: Quickly jump into your next mission seamlessly without unnecessary delays.
Pro Tip: Always keep better ammo and essential meds in your safe box. This ensures you’re well-prepared for any situation, enhancing both your offensive and defensive capabilities.
Operators: Choose Wisely
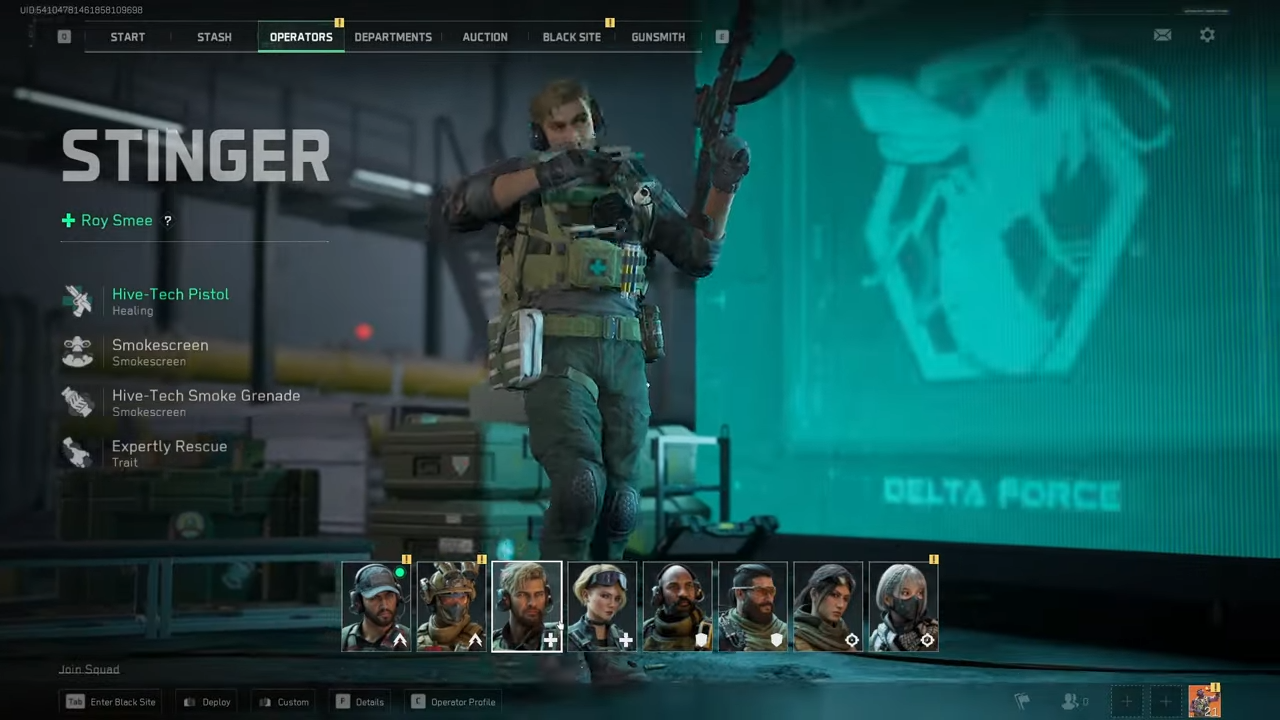
Selecting the right operator can make or break your raid. Operators come with unique abilities that can significantly influence your gameplay. Here are some top picks:
Stinger
- Abilities:
- Free Healing: Provides free healing for both you and your teammates.
- Why Choose Stinger:
- Cost-Effective: Meds can be expensive early on, and Stinger’s healing ability is invaluable for sustaining your squad without relying heavily on consumables.
Hack Claw
- Abilities:
- Enemy Location Visibility: Allows you to see enemy positions on the map.
- Why Choose Hack Claw:
- Strategic Advantage: Knowing where enemies are gives you a tactical edge, especially in intense firefights where situational awareness is crucial.
Toxik
- Abilities:
- Swift Healing: Heals you faster during battle.
- Dragonfly Swarm System: Enhances your offensive capabilities with swarm attacks.
- Why Choose Toxik:
- Sustainability: Faster healing keeps you in the fight longer.
- Offensive Boost: The swarm system increases your damage output, making you a formidable opponent.
Pro Tip: Start with at least two Stingers in your squad to maintain constant healing support, ensuring your team stays resilient throughout the mission.
Departments and Missions: Boost Your Operations XP
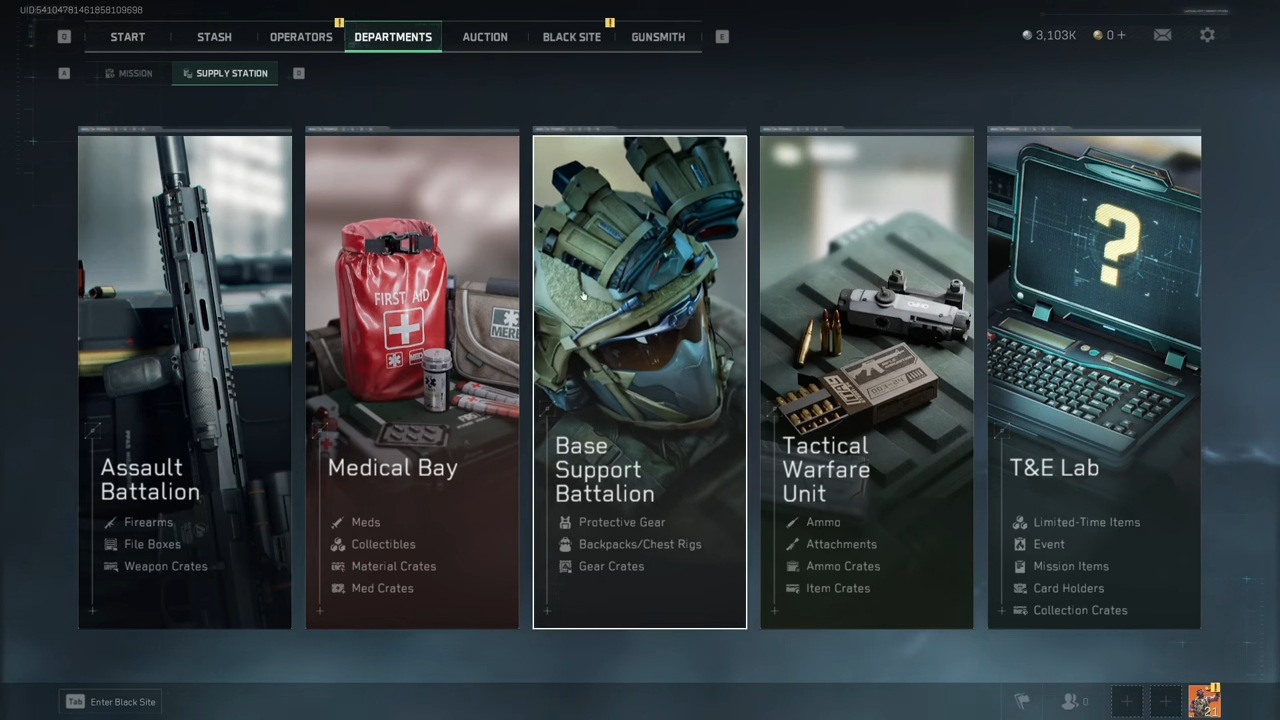
Accepting Missions
Missions are essential for earning Operations XP, which unlocks new items and upgrades. Here’s how to maximize your mission completion:
- Navigate to Departments:
- Access the Departments section from the main menu.
- Accept and complete available missions to earn Operations XP.
- Mini Map Integration:
- Missions appear on the mini map during matches, making them easier to locate and complete without the need for external guides.
Operations XP
- Importance:
- Unlocks new items from Supply Stations.
- Enables upgrades for your Black Site, enhancing your base’s capabilities.
- Maximize XP Gains:
- Focus on completing missions to rapidly increase your Operations Level.
- Higher Operations Levels provide access to better gear, weapons, and upgrades, giving you a competitive edge.
Pro Tip: Consistently complete missions to level up your Operations XP. This not only unlocks valuable items but also enhances your overall gameplay experience.
Supply Stations: Smart Trading for Better Gear
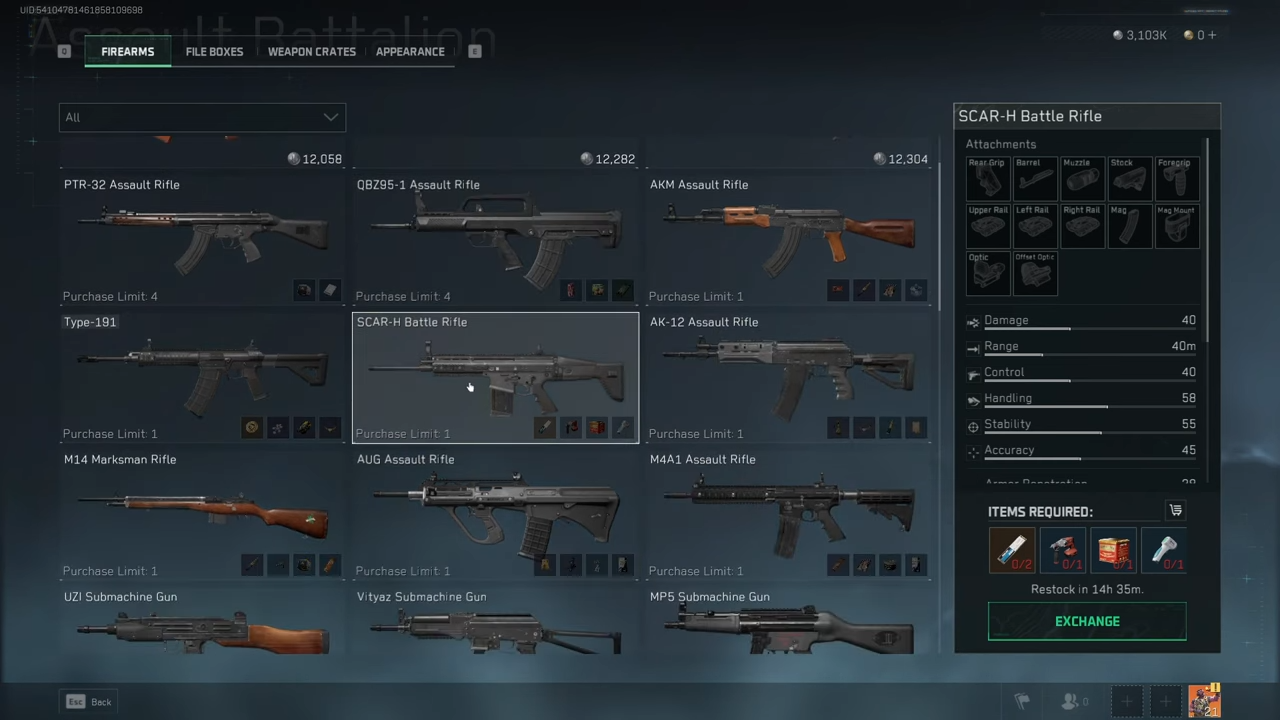
Most players overlook Supply Stations, but they’re a goldmine for savvy traders. Here’s how to make the most out of Supply Stations:
Types of Supply Stations
- Weapon Crates:
- Purpose: Obtain specific weapons at a fraction of the auction house prices.
- Benefit: Access to high-tier weapons without spending excessive in-game currency.
- Appearances:
- Purpose: Purchase skins and cosmetic items to customize your operators and weapons.
- Benefit: Enhance your visual appeal and stand out on the battlefield.
- Med Crates:
- Purpose: Stock up on valuable medical items.
- Benefit: Ensure you have ample supplies to sustain yourself and your team during missions.
Barter Trades
- Advantages:
- Cost-Effective: Sometimes bartering for weapons is cheaper than buying them outright from the auction house. For example, get the MK2 for just 14K instead of 100K on the auction house.
- Strategy:
- Regular Checks: Regularly check Supply Stations for unbeatable deals.
- Selective Saving: Save these deals for when you need specific items, ensuring you get the best value for your resources.
Pro Tip: Always keep an eye on the T& Lab for daily resets and new items that offer incredible value. This is where you can find some of the best deals, allowing you to upgrade your gear without breaking the bank.
Upgrading Your Black Site: Essential for Expansion
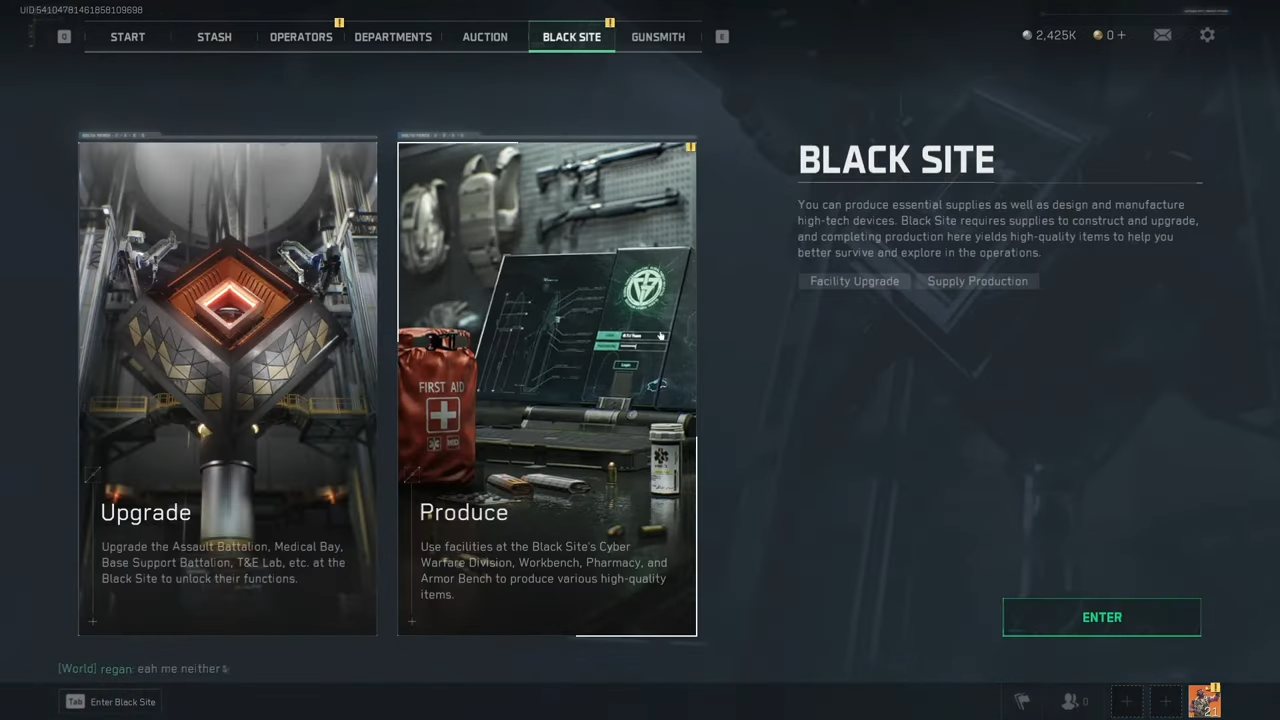
Your Black Site is your personal base of operations, and upgrading it is crucial for long-term success. Here’s how to optimize your Black Site upgrades:
Black Site Upgrades
- Upgrade Tabs:
- Stash Expansion: Increases your storage slots, allowing you to carry more gear and ammo.
- Armor Bench: Enables you to craft better armor, enhancing your survivability in battles.
- Workbench: Allows you to craft ammo, saving you money and ensuring you always have enough firepower.
- Benefits:
- Stash Expansion: More storage means you can carry additional weapons, ammo, and medical supplies, reducing the need for frequent stash management.
- Armor Bench: Crafting higher-tier armor provides better protection, making you harder to take down in combat.
- Workbench: Crafting your own ammo ensures you’re never caught short during missions, maintaining your offensive capabilities.
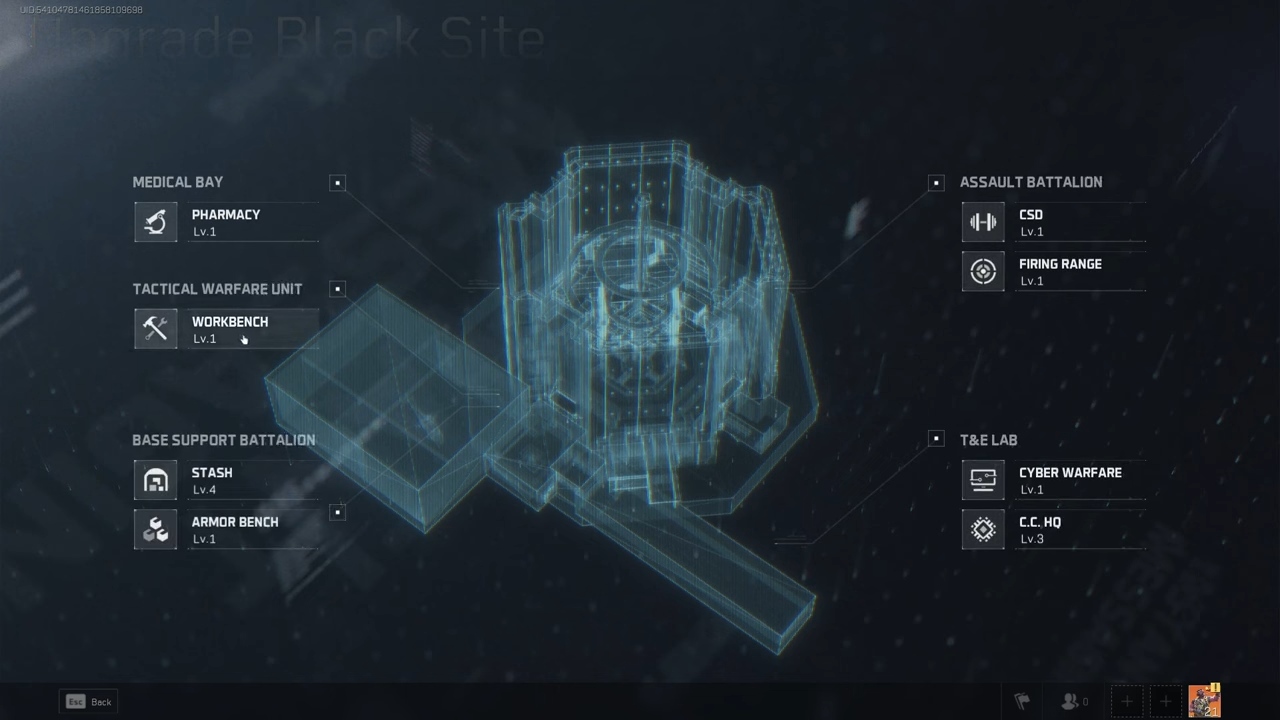
Operations Level Dependency
- Higher Operations Level:
- Unlocks more upgrade options.
- Grants access to better crafting capabilities, allowing you to produce superior gear and ammo.
- Maximize Upgrades:
- Consistently complete missions to level up your Operations XP.
- Higher Operations Levels enable more extensive upgrades, enhancing your Black Site’s functionality and efficiency.
Pro Tip: Focus on upgrading the Stash Expansion, Armor Bench, and Workbench first. These upgrades provide immediate benefits that significantly improve your gameplay experience.
Gunsmithing: Fine-Tune Your Arsenal
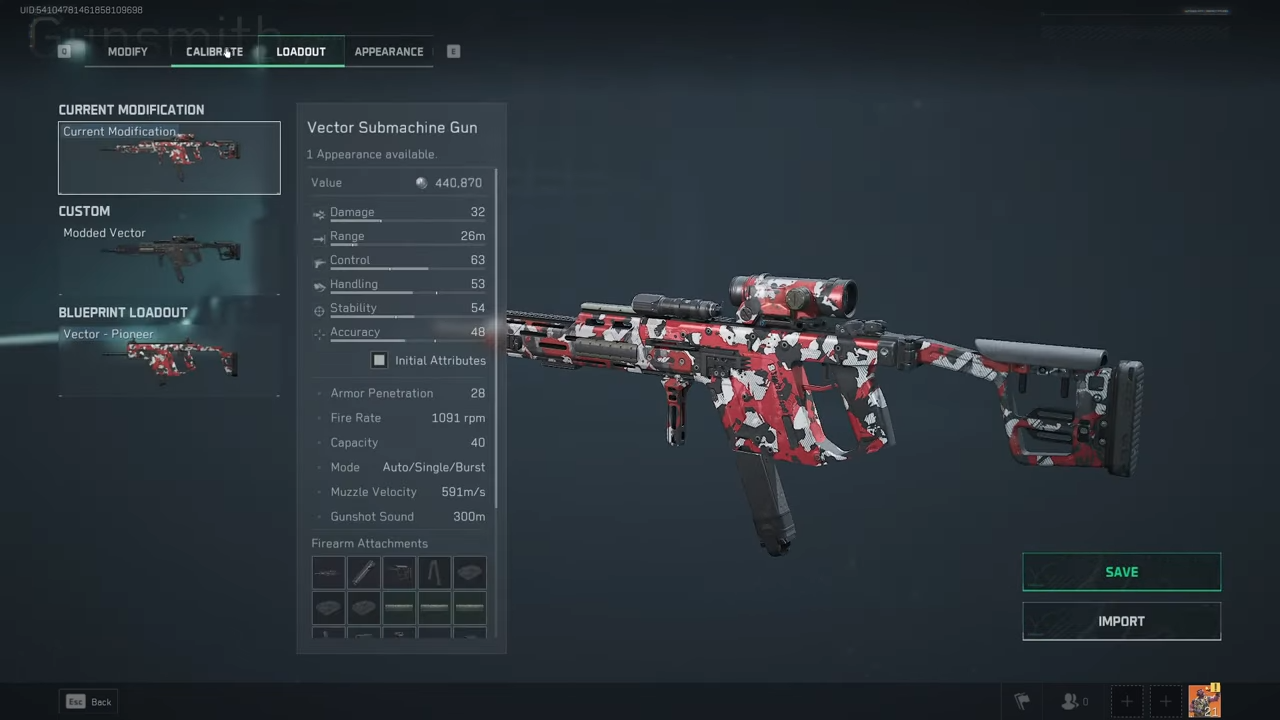
Customizing your weapons is essential for adapting to different combat scenarios. Here’s how to optimize your gunsmithing process:
Customizing Weapons
- Loadouts:
- Save and Name: After customizing your weapons, save and name your loadouts for quick access during raids. For example, “Modded Vector” allows you to switch to a fully customized weapon setup instantly.
- Calibrate Guns:
- Adjust Zoom Levels: Modify the zoom on optics to suit your preference, such as increasing zoom by 0.25 or 0.5 for better target acquisition.
- Modify Barrel Weight and Length: Adjust these parameters to enhance weapon handling and performance based on your playstyle.
- Stat Enhancements:
- Improve ADS Speed: Enhance the speed at which you can aim down sights, allowing for quicker target acquisition.
- Overall Handling: Modify various stats to ensure smoother and more responsive weapon handling during combat.
Pro Tip: Focus on ammo selection early on. High-penetration ammo like blue or purple ensures you can take down opponents effectively, even with less modded weapons.
Meds and Repairs: Stay in the Fight
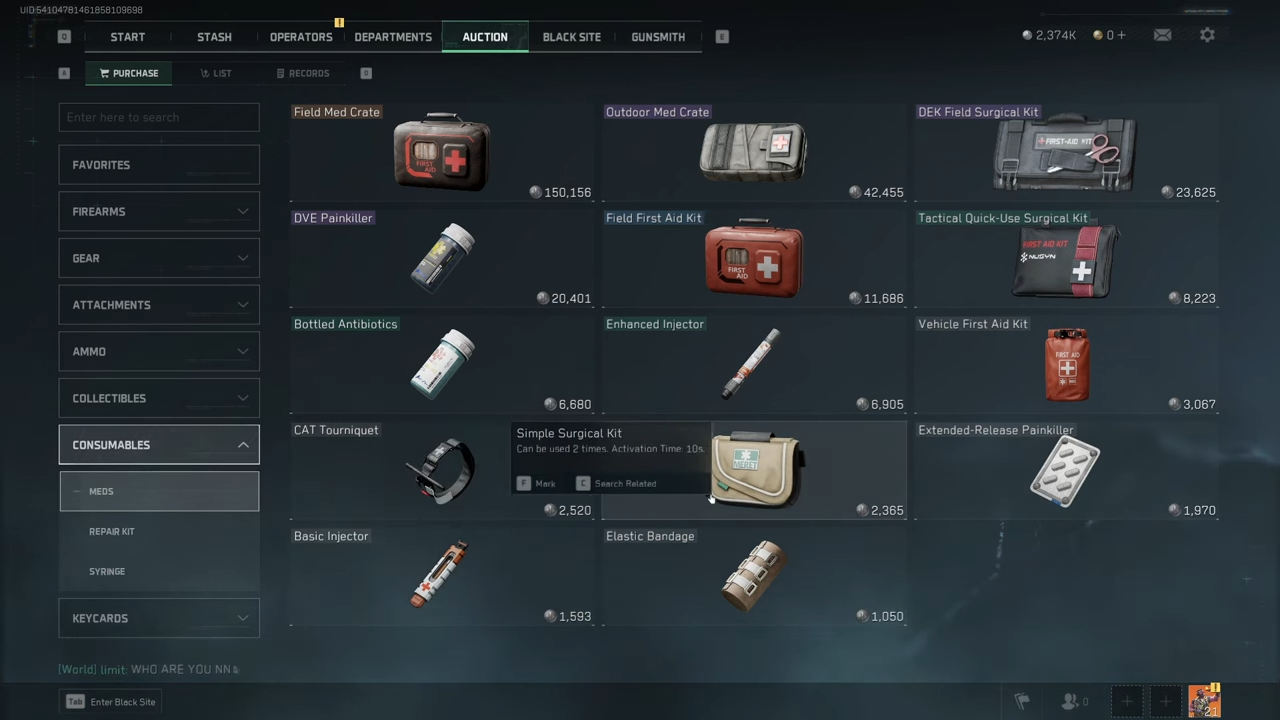
Maintaining your health and armor is crucial for surviving intense battles. Here’s how to manage your meds and repairs effectively:
Essential Meds
- First Aid Kit:
- Function: Heals you when your health is low.
- Usage: Use it to recover health during or after battles to stay in the fight longer.
- Surgical Kit:
- Function: Treats broken bones, bleeds, and other severe injuries.
- Usage: Essential for maintaining mobility and reducing downtime caused by injuries.
- Painkillers and Injectors:
- Function: Provide faster health regeneration during combat.
- Usage: Use these to quickly recover health without waiting for passive healing, keeping you battle-ready.
Repair Kits
- Importance:
- Armor Durability: Armor breaks quickly in gunfights, reducing your protection. Repair kits are essential to maintain your armor’s effectiveness.
- Upgrade to Purple Repair Kits:
- Benefits: Offer better durability and quicker repairs, ensuring you’re always protected during engagements.
Pro Tip: Carry multiple repair kits and syringes to sustain yourself through prolonged engagements. This ensures you remain resilient even during extended battles.


